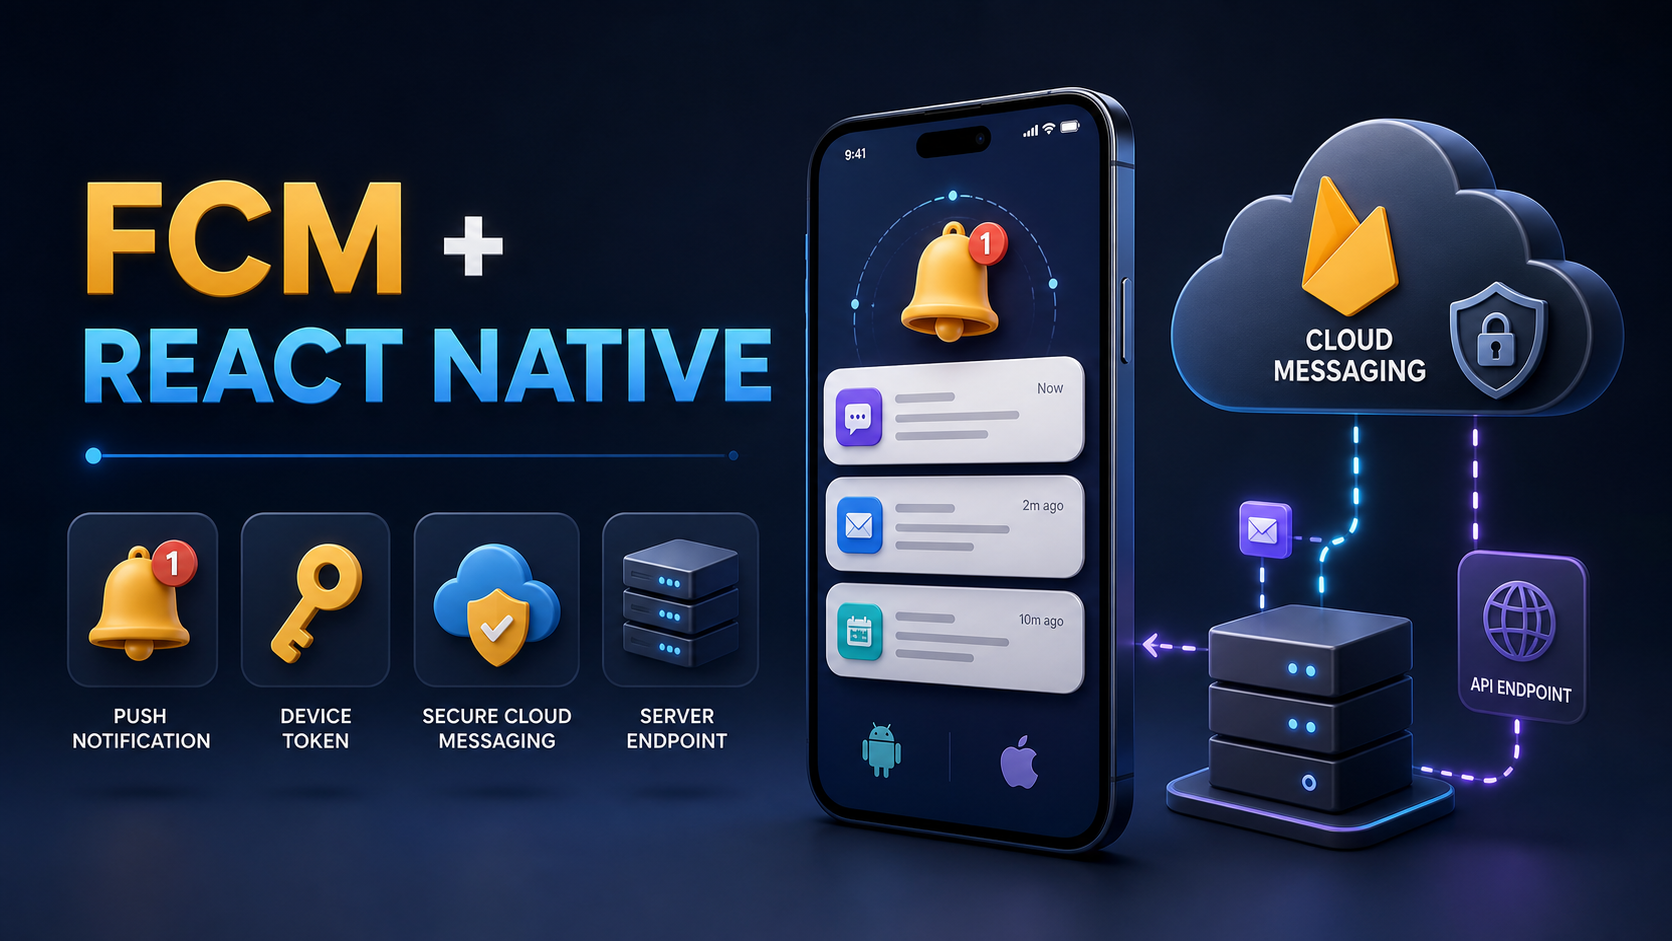

Firebase Cloud Messaging (FCM) là dịch vụ gửi thông điệp từ server tới ứng dụng Android và iOS. Trong React Native, một tích hợp hoàn chỉnh không chỉ dừng ở việc lấy được FCM token. Ứng dụng còn phải xin quyền đúng thời điểm, xử lý message theo trạng thái foreground/background/quit, cập nhật token trên backend và điều hướng an toàn khi người dùng nhấn thông báo.
Bài viết này hướng dẫn từ đầu đến cuối cho dự án React Native CLI, sử dụng modular API của @react-native-firebase/messaging. Phần chính tập trung vào nhận FCM và xử lý dữ liệu. Phần cuối giới thiệu Notifee nếu cần hiển thị system notification khi ứng dụng đang foreground.
Lưu ý phiên bản: React Native Firebase thay đổi API và yêu cầu kiến trúc theo từng major version. Hãy kiểm tra release tương thích với phiên bản React Native của dự án. Mã trong bài dùng modular API hiện hành như
getMessaging,getToken,onMessagevàsetBackgroundMessageHandler.
Nội dung chính
- FCM hoạt động như thế nào?
- Tạo ứng dụng trên Firebase Console
- Cài thư viện
- Cấu hình Android
- Cấu hình iOS và APNs
- Xin quyền thông báo
- Lấy, đồng bộ và làm mới FCM token
- Xử lý foreground, background và quit state
- Điều hướng khi nhấn thông báo
- Gửi thử từ Firebase Console và backend
- Hiển thị notification foreground với Notifee
- Checklist test và xử lý lỗi
1. FCM hoạt động như thế nào?
Luồng cơ bản gồm bốn thành phần:
- Ứng dụng đăng ký với Firebase và nhận một FCM registration token đại diện cho app instance trên thiết bị.
- Ứng dụng gửi token này về backend kèm user ID, platform và thời điểm cập nhật.
- Backend dùng Firebase Admin SDK hoặc FCM HTTP v1 API để gửi message tới token hoặc topic.
- FCM chuyển message qua Google Play services trên Android hoặc APNs trên iOS.
Token không phải user ID và không nên coi là cố định. Một người dùng có thể đăng nhập nhiều thiết bị; một thiết bị cũng có thể sinh token mới sau khi cài lại ứng dụng, khôi phục thiết bị hoặc khi Firebase làm mới registration.
Notification message và data message
| Loại | Đặc điểm | Trường hợp dùng |
|---|---|---|
notification |
FCM tự hiển thị khi app ở background/quit | Thông báo thông thường |
data |
App tự xử lý toàn bộ key-value | Đồng bộ ngầm, nghiệp vụ tùy biến |
notification + data |
Hiển thị thông báo và gửi thêm dữ liệu điều hướng | Phổ biến nhất cho ứng dụng sản phẩm |
FCM giới hạn payload message ở khoảng 4096 byte. Các giá trị trong data nên là chuỗi. Không gửi access token, mật khẩu, nội dung nhạy cảm hoặc dữ liệu mà người dùng chưa được phép xem. Kết nối tới FCM được mã hóa nhưng payload không mặc định là mã hóa đầu cuối.
2. Tạo ứng dụng trên Firebase Console
- Truy cập Firebase Console và tạo project.
- Trong Project settings, thêm một Android app và một iOS app.
- Android package name phải khớp với
namespace/applicationIdcủa dự án. - iOS bundle ID phải khớp chính xác với Bundle Identifier trong Xcode.
- Tải
google-services.jsoncho Android vàGoogleService-Info.plistcho iOS.
Không dùng chung file cấu hình giữa dev, staging và production nếu các môi trường thuộc Firebase project khác nhau. Một sai lệch nhỏ ở package name hoặc bundle ID cũng đủ khiến token không hoạt động.
3. Cài thư viện
yarn add @react-native-firebase/app @react-native-firebase/messaging

# Quản lý quyền notification theo API hiện hành
yarn add react-native-permissions

cd ios
pod install --repo-update
cd ..
@react-native-firebase/app phải được cấu hình trước các module Firebase khác. Sau khi thêm native dependency, cần build lại ứng dụng; reload Metro không đủ.
yarn android
# hoặc
yarn ios
Với react-native-permissions, hãy bật permission handler Notifications trong Podfile theo hướng dẫn của thư viện rồi chạy lại pod install.
4. Cấu hình Android
4.1. Thêm google-services.json
Đặt file đúng đường dẫn:
android/app/google-services.jsonKiểm tra package_name trong file khớp với applicationId của variant đang chạy. Nếu dự án dùng applicationIdSuffix ".debug", bạn cần đăng ký đúng app debug trên Firebase hoặc có cấu hình tương ứng.
4.2. Bật Google Services Gradle plugin
Với dự án dùng kiểu buildscript, thêm plugin vào android/build.gradle theo phiên bản được tài liệu React Native Firebase khuyến nghị:
buildscript {
  dependencies {
    classpath 'com.google.gms:google-services:4.5.0'
  }
}
Trong android/app/build.gradle:
apply plugin: 'com.android.application'
apply plugin: 'com.google.gms.google-services'
Nếu template dùng Gradle plugins DSL, giữ đúng phong cách sẵn có của dự án và khai báo com.google.gms.google-services trong block plugins. Không trộn hai cơ chế nếu chưa hiểu cấu hình Gradle hiện tại.
4.3. Quyền notification trên Android 13+
Android 13, API 33, yêu cầu runtime permission POST_NOTIFICATIONS. Firebase SDK mới thường đã merge permission vào manifest, nhưng khai báo rõ giúp dự án dễ kiểm soát:
<manifest xmlns:android="http://schemas.android.com/apk/res/android">
  <uses-permission android:name="android.permission.POST_NOTIFICATIONS" />
  <application ...>
    ...
  </application>
</manifest>
Trên Android 12L trở xuống không cần xin runtime permission notification. Trên Android 13+, token vẫn có thể được tạo dù người dùng chưa cho phép, nhưng hệ điều hành sẽ không hiển thị notification.
4.4. Icon và notification channel
Android small icon nên là biểu tượng trắng đơn sắc trên nền trong suốt. Nếu dùng launcher icon nhiều màu, một số máy sẽ hiển thị thành ô vuông hoặc icon trắng hoàn toàn.
Đặt icon vào android/app/src/main/res/drawable, sau đó cấu hình mặc định trong AndroidManifest.xml:
<application ...>
  <meta-data
    android:name="com.google.firebase.messaging.default_notification_icon"
    android:resource="@drawable/ic_notification" />

  <meta-data
    android:name="com.google.firebase.messaging.default_notification_color"
    android:resource="@color/notification_accent" />
</application>
Từ Android 8, notification phải thuộc một channel. Channel được tạo ở phía ứng dụng, thường bằng Notifee hoặc native API. Sau khi channel tồn tại, người dùng có quyền đổi âm thanh và mức ưu tiên; đổi code không phải lúc nào cũng ghi đè setting đã lưu trên thiết bị.
5. Cấu hình iOS và APNs
5.1. Thêm GoogleService-Info.plist đúng target
Mở ios/YourApp.xcworkspace bằng Xcode, kéo GoogleService-Info.plist vào project và chọn:
- Copy items if needed
- Đúng app target trong Target Membership
Chỉ chép file vào thư mục bằng Finder chưa chắc làm file được đóng gói vào target.
5.2. Khởi tạo Firebase
Với React Native 0.77 trở lên và AppDelegate.swift:
import Firebase

@main
class AppDelegate: RCTAppDelegate {
  override func application(
    _ application: UIApplication,
    didFinishLaunchingWithOptions launchOptions: [UIApplication.LaunchOptionsKey: Any]? = nil
  ) -> Bool {
    FirebaseApp.configure()

    return super.application(
      application,
      didFinishLaunchingWithOptions: launchOptions
    )
  }
}
Với project React Native cũ dùng Objective-C/Objective-C++, cấu hình tương đương là [FIRApp configure] trong didFinishLaunchingWithOptions.
5.3. Bật capabilities
Trong Xcode, chọn app target → Signing & Capabilities:
- Thêm Push Notifications.
- Thêm Background Modes và chọn Remote notifications nếu cần data-only/background processing.
- Đảm bảo provisioning profile chứa entitlement
aps-environment.
5.4. Tạo và upload APNs authentication key
- Vào Apple Developer → Certificates, Identifiers & Profiles → Keys.
- Tạo key có quyền Apple Push Notifications service.
- Tải file
.p8và lưu Key ID, Team ID. File.p8chỉ tải được một lần. - Trong Firebase Console → Project settings → Cloud Messaging → iOS app configuration, upload APNs authentication key.
APNs key dùng được cho cả sandbox và production. Không đưa file .p8 vào repository hoặc bundle ứng dụng.
Kiểm thử iOS: hãy dùng iPhone/iPad thật. Theo tài liệu React Native Firebase hiện tại, iOS simulator không cung cấp luồng đăng ký APNs/FCM end-to-end đáng tin cậy cho module này.
6. Xin quyền thông báo đúng thời điểm
Đừng hiển thị native permission dialog ngay khi mở app nếu người dùng chưa hiểu lợi ích. Nên có một màn hình hoặc lời giải thích ngắn, sau đó xin quyền khi họ bật tính năng nhận thông báo.
// src/notifications/permission.ts
import {
  requestNotifications,
  RESULTS,
} from 'react-native-permissions';

export async function requestNotificationPermission() {
  const {status} = await requestNotifications([
    'alert',
    'badge',
    'sound',
  ]);

  return status === RESULTS.GRANTED || status === RESULTS.LIMITED;
}
Nếu status là BLOCKED, hệ thống thường không hiện dialog lần nữa. Hãy giải thích cho người dùng và cung cấp nút mở app settings thay vì liên tục gọi request.
import {openSettings} from 'react-native-permissions';

await openSettings('application');
7. Lấy, đồng bộ và làm mới FCM token
Tạo một lớp nhỏ chịu trách nhiệm về token. Không rải lời gọi getToken ở nhiều màn hình.
// src/notifications/fcmToken.ts
import {
  getMessaging,
  getToken,
  onTokenRefresh,
} from '@react-native-firebase/messaging';

const messaging = getMessaging();

type RegisterTokenInput = {
  token: string;
  platform: 'android' | 'ios';
};

async function registerTokenOnServer(input: RegisterTokenInput) {
  const response = await fetch('https://api.example.com/me/devices', {
    method: 'POST',
    headers: {
      'Content-Type': 'application/json',
      Authorization: 'Bearer USER_ACCESS_TOKEN',
    },
    body: JSON.stringify(input),
  });

  if (!response.ok) {
    throw new Error('Không thể đồng bộ FCM token');
  }
}

export async function syncFcmToken(
  platform: 'android' | 'ios',
) {
  const token = await getToken(messaging);
  await registerTokenOnServer({token, platform});
  return token;
}

export function observeFcmTokenRefresh(
  platform: 'android' | 'ios',
) {
  return onTokenRefresh(messaging, async token => {
    try {
      await registerTokenOnServer({token, platform});
    } catch (error) {
      console.error('Không thể cập nhật FCM token mới', error);
    }
  });
}
Khởi tạo sau khi người dùng đồng ý nhận thông báo và đã đăng nhập:
useEffect(() => {
  let unsubscribeTokenRefresh: undefined | (() => void);

  async function setupPush() {
    const granted = await requestNotificationPermission();
    if (!granted) return;

    const platform = Platform.OS === 'ios' ? 'ios' : 'android';
    await syncFcmToken(platform);
    unsubscribeTokenRefresh = observeFcmTokenRefresh(platform);
  }

  setupPush().catch(console.error);

  return () => unsubscribeTokenRefresh?.();
}, []);
Backend nên lưu gì?
Một bảng device registration tối thiểu nên có:
user_idfcm_tokencó unique indexplatformvà app versionlast_seen_at/updated_at- trạng thái active hoặc revoked
Khi logout, hãy gỡ quan hệ token-user trên backend. Không nhất thiết gọi deleteToken nếu ứng dụng vẫn cần notification không gắn với tài khoản. Khi FCM trả về lỗi token không còn hợp lệ, backend phải đánh dấu hoặc xóa token đó.
8. Xử lý message theo trạng thái ứng dụng
| Trạng thái | Handler | System tự hiển thị notification? |
|---|---|---|
| Foreground | onMessage |
Không |
| Background | setBackgroundMessageHandler |
Có nếu payload có notification |
| Quit | setBackgroundMessageHandler |
Có nếu payload có notification |
8.1. Foreground
Khi ứng dụng đang mở, FCM không tự bật system notification. Bạn có thể cập nhật badge trong app, hiện banner riêng hoặc dùng Notifee.
// src/notifications/foreground.ts
import {
  getMessaging,
  onMessage,
  type FirebaseMessagingTypes,
} from '@react-native-firebase/messaging';

export function observeForegroundMessages(
  onReceive: (message: FirebaseMessagingTypes.RemoteMessage) => void,
) {
  return onMessage(getMessaging(), async remoteMessage => {
    console.log('FCM foreground:', remoteMessage.messageId);
    onReceive(remoteMessage);
  });
}
Đăng ký listener một lần gần root component và luôn trả về hàm unsubscribe trong cleanup.
8.2. Background và quit state
Background handler phải được đăng ký càng sớm càng tốt, bên ngoài component React, thường trong index.js hoặc index.ts:
// index.js
import {AppRegistry} from 'react-native';
import {
  getMessaging,
  setBackgroundMessageHandler,
} from '@react-native-firebase/messaging';
import App from './App';
import {name as appName} from './app.json';

setBackgroundMessageHandler(
  getMessaging(),
  async remoteMessage => {
    console.log('FCM background:', remoteMessage.messageId);

    // Có thể ghi AsyncStorage hoặc đồng bộ dữ liệu ngắn.
    // Không cập nhật React state hay điều hướng tại đây.
  },
);

AppRegistry.registerComponent(appName, () => App);
Handler phải trả về Promise và nên hoàn thành nhanh. Android chạy nó bằng Headless JS. Trên iOS, background execution bị hệ điều hành giới hạn; nếu Background App Refresh bị tắt hoặc máy ở Low Power Mode, data-only message có thể không đánh thức app.
8.3. Data-only message
Data-only message mặc định có độ ưu tiên thấp. Muốn có cơ hội chạy ở background, backend cần đặt Android priority là high và iOS contentAvailable kèm APNs headers phù hợp. Đây vẫn là cơ chế best-effort, không phải hàng đợi tác vụ bảo đảm tuyệt đối.
9. Điều hướng khi người dùng nhấn thông báo
Không để backend gửi trực tiếp tên route tùy ý rồi truyền vào navigation. Hãy định nghĩa một schema nhỏ và allowlist các loại notification.
// src/notifications/navigation.ts
import type {FirebaseMessagingTypes} from '@react-native-firebase/messaging';
import {navigationRef} from '../navigation/navigationRef';

type NotificationData = {
  type?: string;
  orderId?: string;
  articleId?: string;
};

export function openFromNotification(
  message: FirebaseMessagingTypes.RemoteMessage,
) {
  const data = (message.data ?? {}) as NotificationData;
  if (!navigationRef.isReady()) return false;

  switch (data.type) {
    case 'order_detail':
      if (!data.orderId) return false;
      navigationRef.navigate('OrderDetail', {id: data.orderId});
      return true;

    case 'article_detail':
      if (!data.articleId) return false;
      navigationRef.navigate('ArticleDetail', {id: data.articleId});
      return true;

    default:
      navigationRef.navigate('Notifications');
      return true;
  }
}
Xử lý hai trường hợp: app đang background và app được mở từ quit state.
import {
  getInitialNotification,
  getMessaging,
  onNotificationOpenedApp,
} from '@react-native-firebase/messaging';

useEffect(() => {
  const messaging = getMessaging();

  const unsubscribeOpened = onNotificationOpenedApp(
    messaging,
    openFromNotification,
  );

  getInitialNotification(messaging)
    .then(message => {
      if (message) {
        // Nếu NavigationContainer chưa ready, lưu message tạm
        // và xử lý trong onReady của NavigationContainer.
        openFromNotification(message);
      }
    })
    .catch(console.error);

  return unsubscribeOpened;
}, []);
Nếu app dùng Notifee 7 trở lên, sự kiện nhấn notification sẽ do Notifee xử lý; onNotificationOpenedApp và getInitialNotification của React Native Firebase có thể không được gọi. Khi đó cần chuyển logic điều hướng sang Notifee foreground/background event.
10. Gửi thử notification
10.1. Gửi từ Firebase Console
- In FCM token ra màn hình debug hoặc gửi token lên backend.
- Vào Firebase Console → Messaging → Create campaign/Send test message.
- Nhập title và body, chọn Send test message, dán registration token.
- Test lần lượt khi app foreground, background và bị đóng.
Firebase Console phù hợp để smoke test. Production nên gửi từ môi trường server tin cậy bằng Firebase Admin SDK hoặc HTTP v1 API.
10.2. Gửi từ backend Node.js bằng Firebase Admin SDK
npm install firebase-adminimport {applicationDefault, initializeApp} from 'firebase-admin/app';
import {getMessaging} from 'firebase-admin/messaging';
initializeApp({
credential: applicationDefault(),
});
export async function sendOrderNotification(
token: string,
orderId: string,
) {
return getMessaging().send({
token,
notification: {
title: 'Đơn hàng đã được cập nhật',
body: 'Nhấn để xem trạng thái mới nhất.',
},
data: {
type: 'order_detail',
orderId,
},
android: {
priority: 'high',
notification: {
channelId: 'important',
sound: 'default',
},
},
apns: {
payload: {
aps: {
sound: 'default',
badge: 1,
},
},
},
});
}Service account credential chỉ tồn tại ở backend, Cloud Functions hoặc hệ thống CI/CD bí mật. Tuyệt đối không đóng gói service-account JSON hoặc server key vào ứng dụng mobile. FCM HTTP v1 sử dụng OAuth 2.0 access token ngắn hạn; không xây tính năng mới trên legacy server key.
10.3. Payload data-only cho background sync
await getMessaging().send({
  token,
  data: {
    type: 'sync_messages',
    conversationId: 'abc-123',
  },
  android: {
    priority: 'high',
  },
  apns: {
    headers: {
      'apns-push-type': 'background',
      'apns-priority': '5',
      'apns-topic': 'com.example.app',
    },
    payload: {
      aps: {
        contentAvailable: true,
      },
    },
  },
});
Không dùng data-only push cho công việc bắt buộc phải hoàn thành ngay. Hệ điều hành có thể trì hoãn hoặc bỏ qua để tiết kiệm pin.
11. Hiển thị system notification khi app foreground bằng Notifee
FCM chịu trách nhiệm vận chuyển message. Nếu muốn hiển thị notification có channel, action, icon và kiểu hiển thị đầy đủ ở foreground, có thể thêm Notifee:
yarn add @notifee/react-native
cd ios && pod install && cd ..
import notifee, {AndroidImportance} from '@notifee/react-native';
import type {FirebaseMessagingTypes} from '@react-native-firebase/messaging';
export async function displayForegroundNotification(
message: FirebaseMessagingTypes.RemoteMessage,
) {
const channelId = await notifee.createChannel({
id: 'important',
name: 'Thông báo quan trọng',
importance: AndroidImportance.HIGH,
});
await notifee.displayNotification({
title: message.notification?.title ?? message.data?.title,
body: message.notification?.body ?? message.data?.body,
data: message.data,
android: {
channelId,
smallIcon: 'ic_notification',
pressAction: {id: 'default'},
},
});
}Nối hàm này vào onMessage. Không gọi lại cho notification payload ở background nếu FCM đã tự hiển thị, nếu không người dùng sẽ thấy hai notification giống nhau.
12. Quản lý token và gửi notification ở production
- Upsert token thay vì tạo bản ghi trùng.
- Cập nhật
last_seen_atkhi app mở hoặc token được đồng bộ. - Một user có thể có nhiều token; gửi theo danh sách device đang active.
- Xóa/disable token khi Admin SDK trả lỗi registration không hợp lệ hoặc không còn đăng ký.
- Dùng batch/multicast có giới hạn và retry với exponential backoff cho lỗi tạm thời.
- Không dùng topic để gửi dữ liệu riêng tư cho một người dùng.
- Log message ID, loại message và kết quả gửi; không log toàn bộ nội dung nhạy cảm.
- Chống gửi trùng bằng event ID/idempotency key ở backend.
13. Checklist kiểm thử và xử lý lỗi
Checklist trước khi test
google-services.jsonđúng package và đúng variant.GoogleService-Info.plistthuộc đúng iOS target.- Firebase được khởi tạo trong AppDelegate.
- Xcode đã bật Push Notifications và Remote notifications.
- APNs key đã upload đúng Firebase project.
- Android 13+ đã cho phép notification.
- iOS đã cấp quyền alert/badge/sound.
- Đang test iOS bằng thiết bị thật.
- FCM token đã được lấy và gửi lên backend.
- Background handler nằm trong entry file, không nằm trong component.
Lỗi: Có token nhưng Android 13 không hiện notification
Kiểm tra runtime permission POST_NOTIFICATIONS, app-level notification setting và channel setting. Token tồn tại không có nghĩa là quyền hiển thị đã được cấp.
Lỗi: Foreground nhận onMessage nhưng không thấy banner hệ thống
Đây là hành vi bình thường. FCM không tự hiển thị notification payload khi app foreground. Hãy cập nhật UI trong app hoặc dùng Notifee để tạo local notification.
Lỗi: iOS không có token hoặc không nhận được push
Kiểm tra bundle ID, APNs key, provisioning profile, entitlement aps-environment, quyền notification và thiết bị thật. Nếu tắt Firebase method swizzling, bạn phải tự ánh xạ APNs token cho Firebase; không nên tắt nếu không có yêu cầu đặc biệt.
Lỗi: Data-only message không chạy ở background
Android cần priority high. iOS cần contentAvailable, APNs background headers và Background Modes. Dù cấu hình đúng, Low Power Mode hoặc Background App Refresh bị tắt vẫn có thể ngăn handler chạy.
Lỗi: Nhấn notification nhưng không điều hướng
Thường do NavigationContainer chưa ready khi xử lý initial notification. Lưu message tạm, sau đó xử lý trong callback onReady. Đồng thời kiểm tra payload data có đủ type và ID cần thiết.
Lỗi: Notification bị hiển thị hai lần
FCM đã tự hiển thị notification payload ở background nhưng background handler lại gọi Notifee để hiển thị thêm. Chỉ tạo local notification cho foreground hoặc data-only message theo thiết kế của bạn.
Lỗi: Debug nhận được nhưng release không nhận
Kiểm tra release package/bundle ID, file Firebase của release, signing entitlement, APNs key và Firebase project. Đừng chỉ test build debug rồi giả định cấu hình production giống hệt.
Kết luận
Một tích hợp FCM ổn định cần ba lớp rõ ràng: native configuration đúng cho từng nền tảng, notification service trong app xử lý token và trạng thái, cùng backend quản lý registration và gửi message an toàn. Khi ba lớp này tách biệt, việc debug sẽ đơn giản hơn nhiều so với đặt toàn bộ logic vào App.tsx.
Sau khi hoàn thành bài này, bước nên làm tiếp theo là xây một màn hình Notification Settings trong ứng dụng: cho phép bật/tắt từng nhóm thông báo, đồng bộ preference lên backend và map mỗi nhóm sang channel/topic phù hợp.